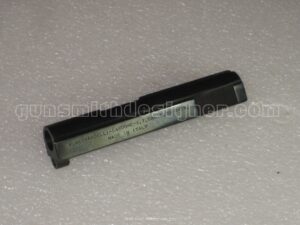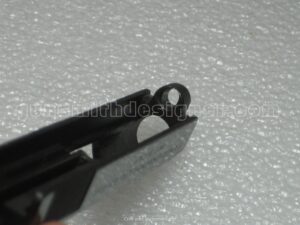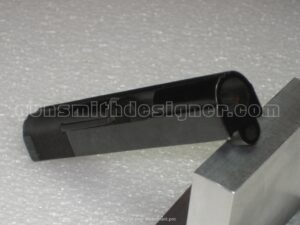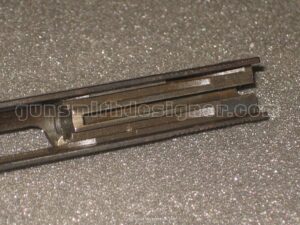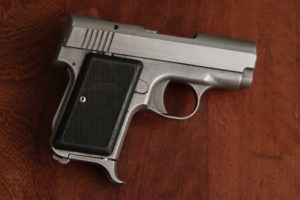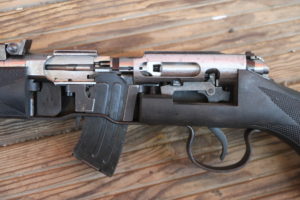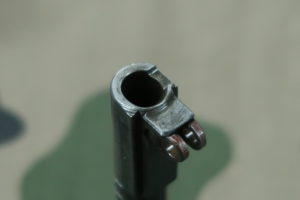
The Bernardelli baby pistol in 25 acp 2/2

This second article on the Bernardelli Baby pistol is the continuation of the first one, published a few weeks ago. The following chapters will cover the frame, the detailed steps of a trigger pull, the magazine, shooting with the Baby pistol, and the conclusion. Enjoy the read…

The first article is here : Le Bernardelli Baby 1/2.

The frame
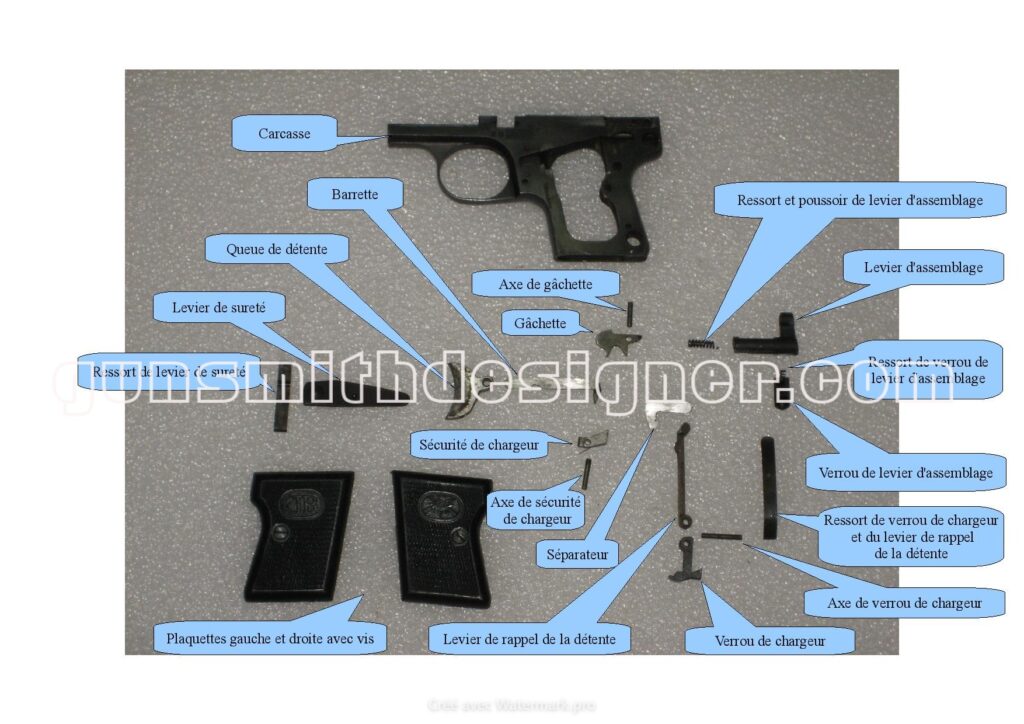
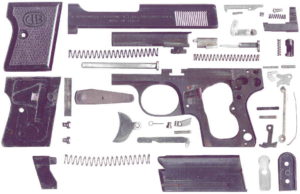
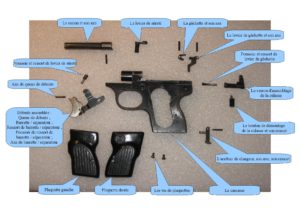
View of the disassembled Bernardelli Baby frame.

The frame sub-assembly is composed of 23 parts :

  • The frame ;
  • The left grip panel ;
  • The right grip panel ;
  • Right and left grip panel screws ;
  • The savety lever spring ;
  • The safety lever ;
  • The trigger bar ;
  • The trigger ;
  • The sear ;
  • The sear pin ;
  • The magazine safety ;
  • The magazine safety pin ;
  • The assembly lever ;
  • The takedown lever spring and plunger ;
  • The takedown lever lock ;
  • The takedown lever lock springs ;
  • The trigger bar ;
  • The magazine catch and sear contrôle pin ;
  • The magazine catch ;
  • The trigger return lever ;
  • The magazine catch and sear control spring.

Detailed gunsmith disassembly of the frame

The “gunsmith” disassembly of the frame is pleasant to perform because several operations do not require any tools. The only useful tools are a screwdriver and a pin punch with a diameter of 1.5 to 2 mm. Here are the steps :

  • Remove the disconnector ;
  • Using a screwdriver, remove the right and left grip panels (be careful not to lose the safety lever spring located inside the left grip panel) ;
  • Remove the safety lever ;
  • Remove the trigger bar ;
  • Remove the trigger ;
  • Using a 1.5 to 2 mm pin punch, drive out the sear pin. You can then remove: the sear, the takedown lever, the takedown lever spring and plunger, the takedown lever lock, and the takedown lever lock spring ;
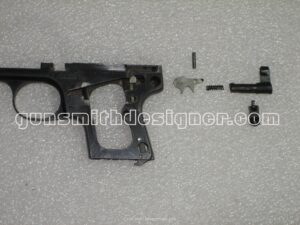
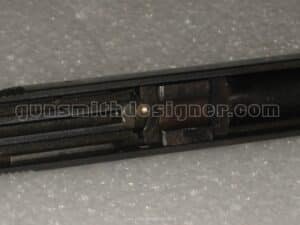
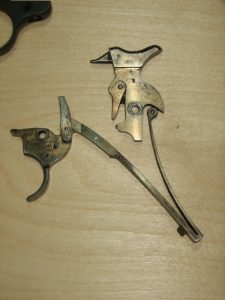
The disassembled Bernardelli Baby sear.

  • Using the same pin punch, drive out the magazine safety pin and remove the magazine safety ;
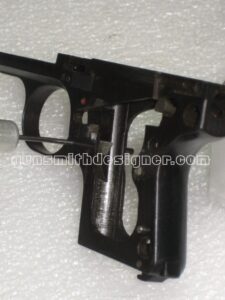
The Bernardelli Baby frame.

  • The final step consists in driving out, still with the same pin punch, the magazine catch pin.
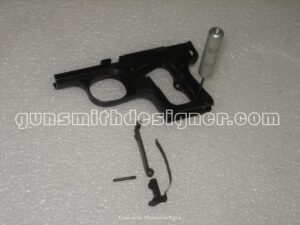
Disassembly of the Bernardelli Baby frame.

At the end of these steps, the firearm is fully disassembled.

The trigger mechanism

  • The mechanism contains very few parts. Although small in size, they are well-machined and properly fitted.

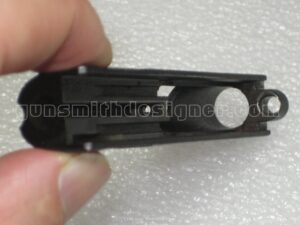
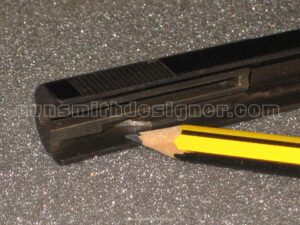
    Some machining work on the frame is complex, particularly the trigger housing. The walls of the magazine well are thin (1.2 mm and 1.36 mm). And yet, the parts are incredibly well-finished.

    How the magazine safety works: it pivots around a pin and is driven by a small spring. When the magazine is not inserted, the magazine safety tilts under the action of its spring and prevents the movement of the trigger. If the magazine safety spring breaks and/or it is difficult to find a replacement, one could consider temporarily removing the magazine safety from the weapon (the removal is explained in the previous section) to continue using it while waiting to source the missing parts. Removing this part does not prevent the gun from functioning. However, one must not forget that a safety feature has been removed, which may alter your safety habits.

    What happens when the shooter presses the trigger (assuming a magazine is inserted, the firing pin is cocked, the slide is closed, and a round is chambered) :

    1. The shooter presses the trigger. By pressing the trigger, the shooter moves the trigger bar backward. The two parts are linked together;
    2. As the trigger bar is in contact with the trigger return lever, the latter pivots around its pin. The trigger return lever is driven by the force of the spring shared with the magazine catch;
    3. The backward movement of the trigger return lever unlocks the sear. Indeed, this part acts as a block for the sear, preventing it from dropping down and thus releasing the firing pin under various circumstances. In other words: after a certain amount of trigger travel, the sear is no longer locked;
    4. The shooter continues to press the trigger. The rear of the trigger bar comes into contact with the sear and forces it to rotate (downward) around its pin;
    5. Past a certain trigger travel, the firing pin is released;
    6. The firing pin spring expands;
    7. Driven by the firing pin spring, the firing pin is driven forward into the cartridge primer;
    8. The primer is detonated, and the resulting flash ignites the gunpowder;
    9. Under the action of the gases produced by the cartridge powder, the walls of the case expand and seal against the walls of the chamber, creating a gas-tight seal;
    10. The bullet leaves its seat in the cartridge case. The projectile exits the barrel;
    11. The impulse produced by the gas expansion is channeled by the barrel. It acts on the projectile on one side and on the cartridge case and slide on the other;
    12. Once the bullet leaves the barrel, the internal pressure drops. The case contracts, no longer sticking to the chamber walls;
    13. The energy acquired by the slide breaks its inertia. The slide begins to move backward;
    14. About 7 mm into the opening stroke, the disconnector drops down and disconnects the sear from the trigger bar engagement;
    15. The released sear returns to its high position under the action of its spring;
    16. The fired cartridge case is ejected;
    17. Pushed by the follower and the magazine spring, the next round in the magazine takes its place against the magazine lips;
    18. The cocking notch of the firing pin passes the cocking notch of the sear, cocking the firing pin;
    19. The slide’s rearward travel is cushioned by the recoil spring;
    20. The recoil spring decompresses, and the slide starts its forward travel;
    21. A new round is pushed toward the chamber;
    22. The firing pin is held back by the sear;
    23. As the slide fully closes, the disconnector resets to its original position under the action of the trigger return lever;
    24. Returning forward, the trigger return lever prompts the trigger bar to move up, thus returning to contact with the sear;
    25. The shooter releases pressure on the trigger;
    26. The trigger bar returns to its rest position;
    27. The firearm is ready to repeat the same cycle if the shooter presses the trigger again.
  • The magazine

This sub-assembly is composed of 05 parts :

  • The magazine body ;
  • The follower spring ;
  • The follower ;
  • The magazine floor lock ;
  • The magazine floorplate.

The magazine is made of sheet metal that has been stamped and then welded. It is surprising to see that the weld seam is not located at the rear, but on the left side. This is unusual, especially since the Baby pistol’s magazine features viewing slots on the sides.
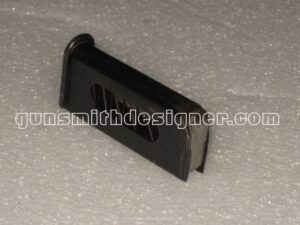
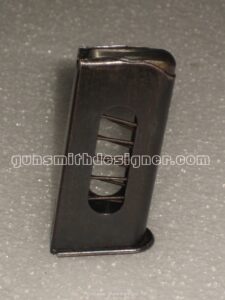
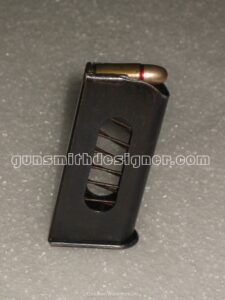
The Bernardelli Baby magazine.

The part is perfectly manufactured and has not suffered from past use. The weld is thin and barely visible, showing no signs of weakness. The placement of the side indicators clearly does not pose a problem for the weld.
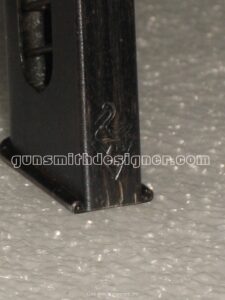
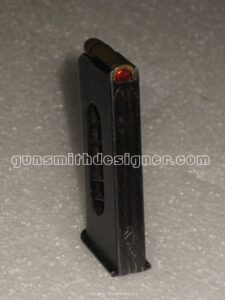
The Bernardelli Baby magazine markings.

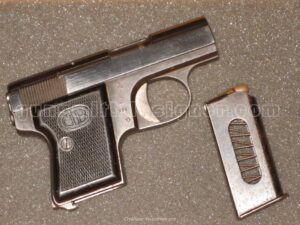
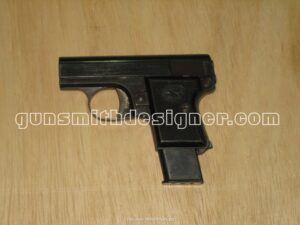
There are two types of magazines for this gun. A 5-round version and an 8-round version. The latter extends past the grip frame and acts as a grip extension. This addition provides greater comfort for the user but increases the overall size of the weapon. You cannot have it both ways.
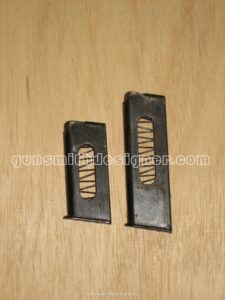
Few people completely and regularly disassemble their firearm’s magazine. This is a mistake, because cleaning it removes all kinds of deposits such as dust build-up, clothing lint, firing residue, and oil, which can eventually jam the follower and cause feeding failures. What could be more useless than a defense pistol that does not work when needed? If you do not perform the disassembly and cleaning yourself, have it done by a conscientious enthusiast, or better yet, a professional.

Below you will find the procedure for disassembling the magazine :

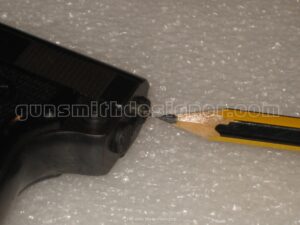
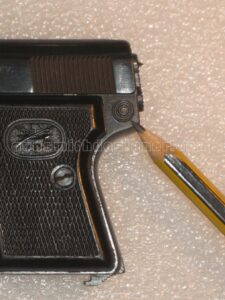
  • Using a tool, push the floorplate lock inward ;
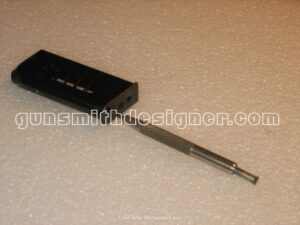
Bernardelli Baby magazine disassembly in progress.

  • Slide the floorplate toward the front of the magazine ;
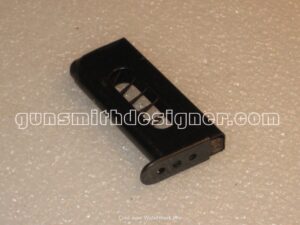
Bernardelli Baby magazine disassembly in progress.

  • Remove the floorplate completely while carefully retaining the floorplate lock and the follower spring ;
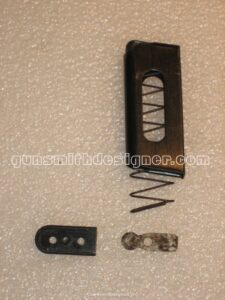
Bernardelli Baby magazine disassembly in progress.

  • Remove the follower and its spring.

Pay attention to the orientation of the parts during disassembly to avoid mistakes when reassembling.

On the model available to me, the follower has side lips that improve guidance. The part appears to be manufactured by stamping a flat sheet of metal.

Shooting the Bernardelli Baby

Shooting this small-sized handgun is very pleasant. The recoil is low, equivalent to shooting a .22 LR round in a similar weapon. Accuracy was not tested due to a lack of available ammunition, and besides, the weapon is not really intended for precision shooting.

The average pressure of a 6.35 mm cartridge is 1,300 bar (source: CIP standards). The proof test pressure is 1,690 bar (source: CIP standards). For a bullet weight of 3.2 grams and a velocity of 200 meters per second, this gives a muzzle energy of 70 Joules (Fiocchi catalog).

The stopping power of the 6.35 mm is not sufficient to instantly stop the attacks of a determined individual, even less so if they are under the influence of narcotics or in a state of delirium. The main appeal of the weapon is its very small size, not its stopping power. In some respects, it can be reassuring to carry this type of defense weapon in your pocket (if regulations allow it), but you must keep in mind that it may not necessarily be enough to get you out of bad situations.

Conclusion

It cannot be easy to mass-produce such small parts. Nevertheless, the V.Bernardelli Baby pistol is very well made. No machining marks are visible. The industrial choices are bold but well-mastered. The aesthetics are very pleasing. The firearm is well-proportioned and well-balanced.

 It would be very interesting to compare the weight of the slides and the strength of the recoil springs between the .22 Short and 6.35 mm versions, in order to correlate this data with the average pressure and bullet weight of both calibers. This would allow the determination of a typical slide weight, a typical barrel length, and a typical recoil spring strength for a given caliber, and then compare them with data from other manufacturers. If you possess this data, I am interested.

 Conducting a “torture test” and analyzing the results provides a wealth of information regarding the design and lifespan of a firearm. While this pistol is not intended for intensive shooting, how would the Baby pistol behave during a torture test? After how many rounds would the first part break? Which components would fail first? Do the same parts break at the same time? How can it be remedied? To date, I do not know if the Bernardelli firm ever conducted this type of test for this handgun. It would be fascinating to have access to the results of such a test.

The choices made by the designers, and those who validated these choices, are of great importance. Right technical decisions allow a firearm to become an icon in its category and stand the test of time, becoming a timeless piece. Design, manufacturing, promotion, and marketing are deeply linked stages which, when successful, anchor a weapon in people’s minds. We will find this firearm many years after its production, still in working order (because it was well-designed), and still pleasant to look at or use. Time will give it a charming patina and greater value. I believe the Baby pistol is one of them.

Posted in All articles, Handguns | Leave a comment

The Bernardelli baby pistol in 25 acp 1/2

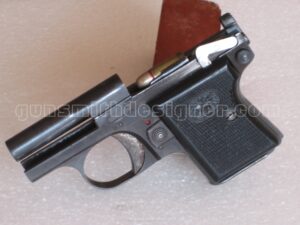
Today, i have the opportunity to write about the V. Bernardelli Model 68, also known as the “Baby”. The firearm I am presenting to you is chambered in 6.35mm or .25 ACP.

I wanted to talk about this handgun because I did not expect to find such a beautiful finish on an arm of this type—namely, a small pocket defense pistol. The second reason for writing this article is how the barrel mounts to the frame. It is quite unusual, extremely well executed, and well worth taking a closer look at.

The second article is here : Le Bernardelli Baby 2/2.

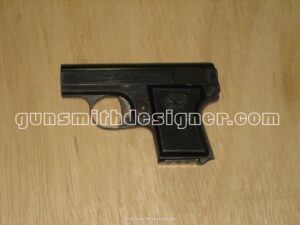
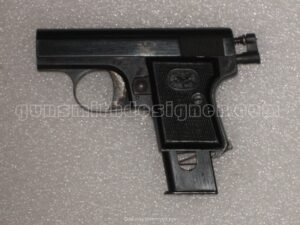
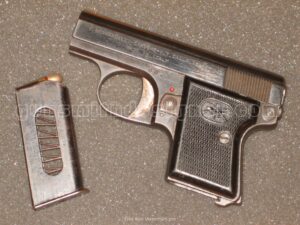
Left face of Bernardelli Baby pistol 25 acp

Bernardelli Baby Specifications

I will not go over the history of this handgun, as I do not have much data on the matter. It seems that the first models appeared in the 1940s/1950s. You can find the history of the V. Bernardelli company by clicking on the brand’s logo.

Logo V.Bernardelli.

A version of this firearm exists in .22 Short. It would have been useful to compare both models to highlight their common points and differences. However, I was unable to gather both versions at the same time. Therefore, I cannot make that comparison today. Hopefully, the future will grant me the opportunity to conduct this experiment later on.

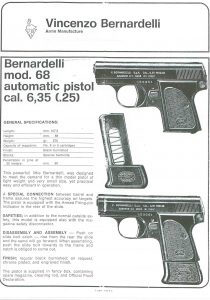
Bernardelli Baby 25 acp manuel

  • Overall Length : 106.5 mm ;
  • Overall height of the weapon : 69 mm (with the 5-rounds magazine), 68.5 mm (without magazine) ;
  • Width : 20.5 mm ;
  • Weight : 260 grams (with an empty 5 rounds magazine) ;
  • Barrel length : 53 mm ;
  • Caliber : 6, 35 mm Browning or 25 acp ;
    • Capacity : 5 to 8 depending on the magazine (a 5 round magazine is featured here) ;
  • Mechanism type : single action ;
  • Safety lever : Located on the left side of the frame ;
  • Magazine safety : yes ;
  • Grip : good handling, despite the small volume of the firearm ;
  • Material : entirely made of steel (except the grip panels) ;
  • Number of parts : 39.

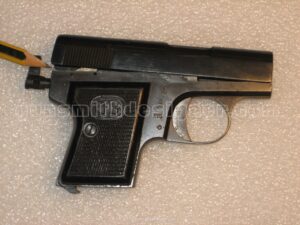
View of the right face of Bernardelli pistol 25 acp.

Field Stripping the Bernardelli Baby :

Field stripping this firearm does not require any special tools. The various steps to complete this task are detailed below :

  • Handling any firearm can cause serious damage. Consequently: always point the firearm in a safe direction away from yourself or others, ensure the weapon is unloaded (no magazine engaged), and check that the chamber is empty ;
  • Remove the magazine from the firearm ;
  • Verify that the chamber is empty ;

While checking the chamber, you will likely cock the striker (depending on how far back you pull the slide). It takes a 23 mm rearward slide stroke to cock the striker. You can tell the stricker is cocked when a small pointed piece protrudes from the back of the slide ;

  • Press the button located on the rear of the frame, on the left side of the firearm ;
  • Regardless of the striker’s position (cocked or uncocked), the assembly lever will pop out of its housing under the pressure of the striker spring and the sear spring ;
  • Push the striker spring back inside the slide. To do this, if the striker was cocked during previous manipulations, you must engage an empty magazine (just enough to disengage the magazine safety from the trigger bar, see the next photo) and pull the trigger (hence the importance of having checked that the chamber is empty);
  • Remove the magazine again ;
  • Pull the slide back a few millimeters to disengage the extractor from its slot ;
  • Once the extractor is disengaged, lift the rear of the slide ;
  • When lifting the rear of the slide, be careful not to lose the disconnector. It is prone to slipping out. We will look at the role of this part later on ;
  • Under the action of the recoil spring, the slide will slide off its housing toward the front. Guide the slide through this movement. Be careful not to lose the disconnector, the striker spring, the striker, the recoil spring, and its guide rod ;
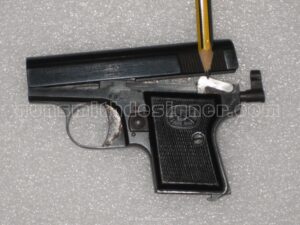
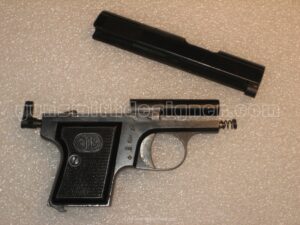
  • To remove the barrel, extract it by pushing it to the left (on my specific model, it comes out through the left side) ;
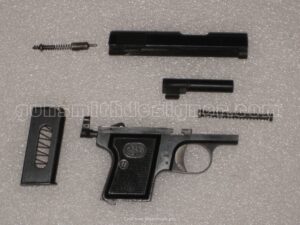
  • Field stripping is now complete; you are left with the following components ;

The Bernardelli Baby Sub-assemblies

The sub-assemblies of the 6.35mm Bernardelli Baby pistol are :

  • The slide / barrel sub-assembly ;
  • The frame sub-assembly ;
  • The magazine sub-assembly.

The Slide / Barrel Sub-assembly

The slide/barrel sub-assembly of the studied weapon consists of 11 pieces:

  • The slide ;
  • The extractor ;
  • The extractor spring ;
  • The extractor pin ;
  • The barrel ;
  • The recoil spring ;
  • The guide rod ;
  • The striker ;
  • The striker spring ;
  • The striker spring guide/cocking indicator ;
  • The cocking indicator return spring.

The slide is made of steel. Its dimensions fit within a volume of: 15.4 mm (width) x 21.5 mm (height) x 104 mm (length).

The weight of the part (with the extractor) is 72 grams. The distance between the underside of the slide (or top of the frame) and the barrel axis is 4.5 mm.

The breech face diameter (where the cartridge casing base sits in the slide) is 8 mm with a depth of 0.94 mm.

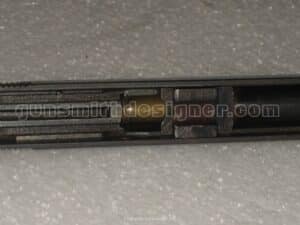
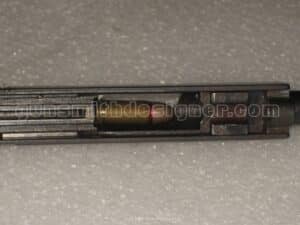
The maximum travel of the barrel inside the slide (the same with or without the recoil spring) is 28 mm, while a live round measures approximately 22.8 mm.

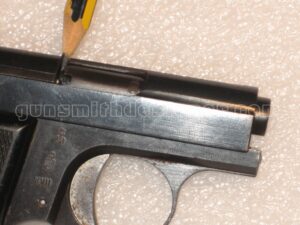
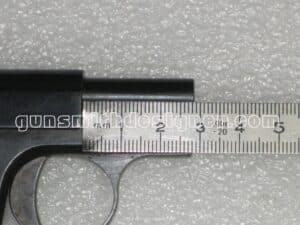
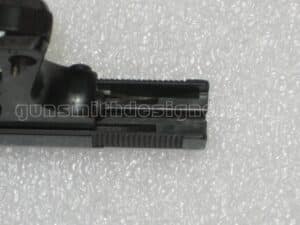
The length of the barrel protruding from the slide, Bernardelli Baby

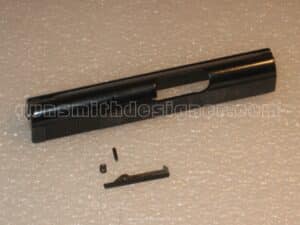
Advanced disassembly of the slide components involves driving the extractor pin out of its hole using a 1.5mm pin punch. The pin is thin and short. The extractor spring measures 3 mm in length with a diameter slightly under 3 mm.

These parts are very small: be careful not to lose them. Stripping these parts gives you proper access to clean the extractor slot. This area is rarely accessible, making it the perfect opportunity to do a thorough job. Clean the parts before reassembly as well.
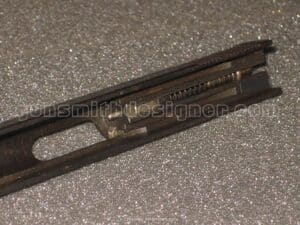
View of the disassembled extractor

The striker body diameter is 5.96 mm. The striker tip diameter is 2 mm. The overall length of the striker is 19.5 mm. It would be interesting to compare the striker of this 6.35mm version with that of the .22 Short version. Indeed, firing a rimfire cartridge like the .22 Short requires striking the rim of the casing. In this case, two layout options seem possible:
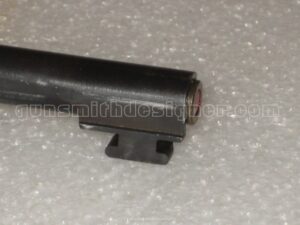
  • Either increase the striker body diameter to 7 mm (the rim diameter of a .22 Short rimfire round) and then offset the striker tip to the periphery of the 7mm cylinder ;
  • Or offset the striker channel itself ;
  • Or apply both solutions simultaneously.

Which option did the manufacturer choose? To this day, I do not have the exact answer because I do not have access to the dimensions of the .22 Short part. However, a schematic of the .22 Short version helps our analysis. On the exploded view below, we can see the shape of the striker, but also that ejection is not operated by the striker itself, but rather by an extension of the striker spring guide rod.

Exploded view of Bernardelli Baby

The slide does not move along the frame via machined rails like on most automatic pistols. The slide is guided at two specific points :

  • The first guide point is the barrel, as the front of the slide cycles around it ;
  • The second is the assembly lever. By entering the striker channel, it restricts the slide’s path.

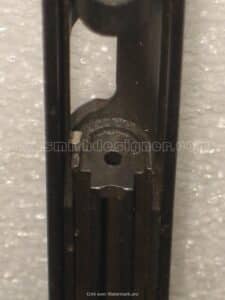
After firing, the slide requires a rearward travel of 23 mm for the striker to cock again. The striker’s cocking lug does not protrude from the bottom of the slide. It is the sear that catches it as it cycles. The striker also functions as the ejector. 

At the end of the slide’s rearward travel, the tip of the striker protrudes by 3.6 mm through the breech face, giving an impulse to the empty casing, which pivots around the extractor and ejects.

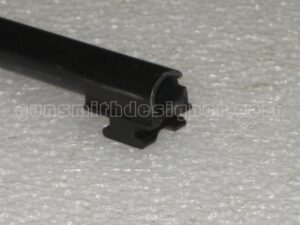
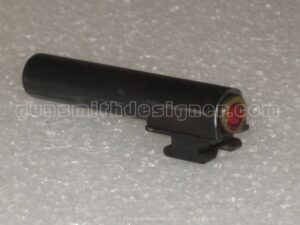
The barrel fits within a volume of: 53 mm (length) x 11.7 mm (width) x 14.4 mm (height). The outer diameter of the round section is 9.8 mm. The weight of the barrel is 21 grams. The rim of the cartridge remains outside the chamber.

Was the barrel rifled after its profile was machined? Or did the rifling happen first, followed by the profile machining? This would be interesting to know. I would lean toward the second option (as it is the most common). Namely: using steel bars several tens of centimeters long, drilled and rifled to the 6.35mm caliber. The bars are then cut to the desired length. The barrel’s outer profile is obtained by machining these cut portions. Finally, the chamber is cut using a specific chamber reamer. The Bernardelli Baby barrel can be manufactured from a rifled blank of 14 mm minimum diameter. The barrel features 6 left-hand grooves.

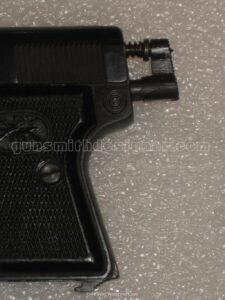
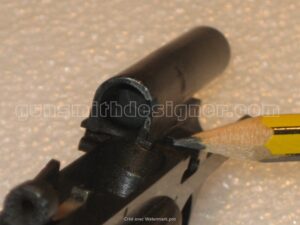
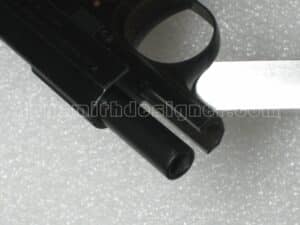
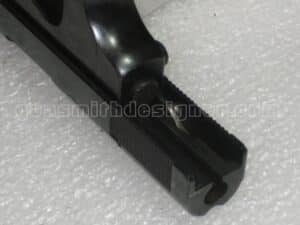
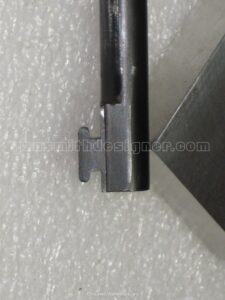
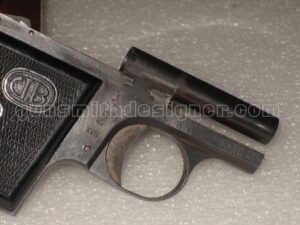
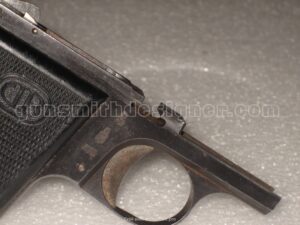
One of the significant design choices on this handgun is the mounting method chosen by V. Bernardelli to lock the barrel to the frame. This type of mounting is rarely utilized. The barrel is secured to the frame via an inverted T-shaped interlocking fit. The barrel slides laterally into a matching groove machined into the frame. The machining does not feature simple rectangular shapes (which one might expect) but rounded curves. While machining the female housing requires a specific form cutter, the male lug requires more complex machining and fitting. I believe this choice reflects the manufacturer’s desire to prevent stress cracks from developing in the corners (particularly the upper corners) which a sharp rectangular shape would be prone to. The fit on my specific handgun is exceptionally well crafted; once seated on the frame, the barrel exhibits almost no play.

The T-shaped mounting lug

The width of the T-lug base is 11 mm. The height of the T-lug base is 2 mm.

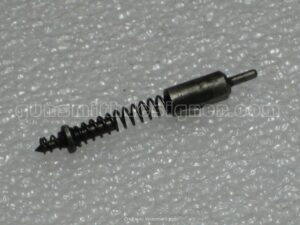
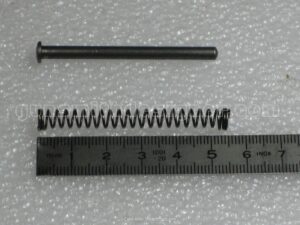
The recoil spring has a length of 55 mm. The wire diameter is 0.7 mm. The spring flares out at both ends. At its center, the outer diameter is 5.7 mm. The flared ends have an outer diameter of 6.6 mm.

The guide rod has a length of 53.6 mm with a body diameter of 4 mm.

The recoil spring assembly of the Bernardelli Baby

To be continued in a future article.

Posted in All articles, Handguns | 11 Comments

The rifle mle 1866 Chassepot 2/2

Through the transcription of an article tinged with a hint of optimism published in 1869, we saw the early adoption of the new standard-issue French rifle: the Chassepot Model 1866.

A weapon firing so many cartridges that the enemy would be quickly torn to pieces in the event of a conflict,’ according to the pre-war article (referring to the war of 1870).

The first article is available here : The rifle mle 1866 Chassepot 1/2

What is the situation in 1873 ? What can be deduced throught the study of more recent texts ? Is there à connection with more contemporary events ?

The adoption of the Chassepot Mle 1866 rifle

In 1865, while the permanent commission of Versailles had chosen a muzzle-loading rifle to replace the standart-issue rifle, Emperor Napoleon III expressed the wish to adopt a breech-loading rifle. Indeed, Prussia’s recent victories forced a more modern choice. This state had adopted a breech-loading rifle decades earlier (1840) : the Dreyse rifle. 

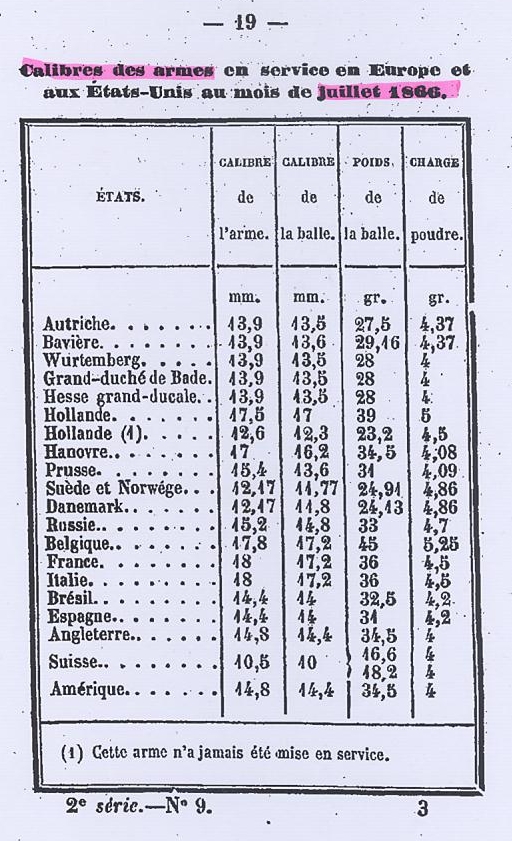
Under Swiss influence, the trend of the area learned toward a reduction in caliber. The goal was a weapon with a coliber between 10 and 15 mm in order to achieve a flatter trajectory and allow firing at greater distances, which was less feasible with a 17 or 18 mm projctile. The aim was thus to heavily impact, or even defeat, the ennemy before hand-to-hand combat.

Table of load differences (diameters, bullet weights, powder charges).

It is a period of rapid technical developments, and many directions exist. However, selection tests are carried out using a rifle that is retrograde but still deeply rooted in people’s minds: the percussion rifle. The latter ultimately represents a benchmark of old weaponry and an old way of waging war. On the other hand, no metallic cartridge weapon is present in the ranks; it is too early for France.

Ultimately, the commission is tasked with ruling on three weapons: the Chassepot rifle, the Chassepot rifle modified by Mr. Plumerel, and a muzzle-loading rifle. The Chassepot rifle was adopted.

The creator of the Mle 1866 rifle is the author of three patents: the rubber obturator, the bolt action mechanism derived from the Prussian Dreyse, and the cartridge. The ballistic characteristics of the barrel and the bullet (bullet length/caliber, bullet weight/powder charge, shape and pitch of the rifling/influence of the projectile’s rotation) were defined based on studies by various contributors and commissions, and then applied to the Chassepot mechanism.

On February 14, 1866, an order for 1,500 weapons was placed with the Châtellerault manufacture.

In June 1866, 400 rifles were received. They would be sent to the Châlons camp to be tested by the Imperial Guard (see the first article on the Chassepot rifle).

On July 3, 1866, the manufactures of St. Étienne and Puteaux were created. The objective was the manufacturing of 150,000 weapons per year and 1,800 machine tools intended for the factories

The Mle 1866 rifle is a resolutely modern weapon for its time. Terribly well-made, it demanded a significant effort from the nation. Then comes the time for the first trials, followed by the trial by fire. The single criterion of the individual firearm is not enough to predict the victor of upcoming battles.

Has the idyllic framework described by the first article evolved? What about the best weapon in Europe? Are Mr. Chassepot’s patents adapted to a weapon of war quickly built before a major conflict? Or to a target rifle? Will the time between the delivery of the rifles and the start of the war be sufficient to remedy the various technical problems ?

The Weapon’s Defects

Gas blowback toward the shooter’s face (synonymous with a lack of gas seal) was the reason for the delayed adoption and proliferation of breech-loading weapons. Mr. Chassepot used a material that was recent for the era—a rubber washer—to achieve this seal, which, as a side benefit, reduced the weapon’s recoil. The part deteriorated in various ways: it cracked, melted and blocked the needle channel, or lost its elasticity. The blowback increased progressively as the washer lost its diameter while melting. The soldier carried a replacement part in his cartridge pouch. The use of this material was a bold choice; to this day, very few firearms have used rubber for this function, and the Chassepot may be the only one.

As seen above, the seal was more or less effective toward the outside. The same applied to the inside. Gases resulting from powder combustion travel anywhere they encounter no resistance. Consequently, they blew back into the bolt through the firing pin needle channel. This resulted in annealing (softening) the striker spring, leading to weak strikes or even spring breakage. In some cases, it was possible to cock the hammer (the striker) by slamming the buttplate on the ground. Combustion gases also heavily fouled the inside of the bolt.

Fouling did not only affect the inside of the bolt, but the chamber as well. Debris and shooting residue remained inside, preventing the chambering of subsequent rounds. 

The needle’s diameter was 1.5 mm. Doubling the diameter to 3 mm would provide four times the strength, according to a study from that era.

Forcefully closing the bolt could cause an accidental discharge of a cartridge. This slamming action occurred due to the absence of a locking cam/inclined closing ramp on the receiver. The presence of this machining helps the shooter progressively push the ammunition into the chamber while locking the bolt. The vast majority of modern bolt-action weapons feature this ramp, providing unparalleled smoothness.

The weapon’s polished white finish, besides being highly visible from afar, required significant maintenance to prevent corrosion.

Despite the speech by Mr. Thiers, President of the Republic, on June 8, 1872 :

“In the opinion of military men, the Chassepot rifle was the best weapon in use among armies. The Chassepot rifle is recognized as excellent, except for its cartridge, which every European country is seeking to improve…”

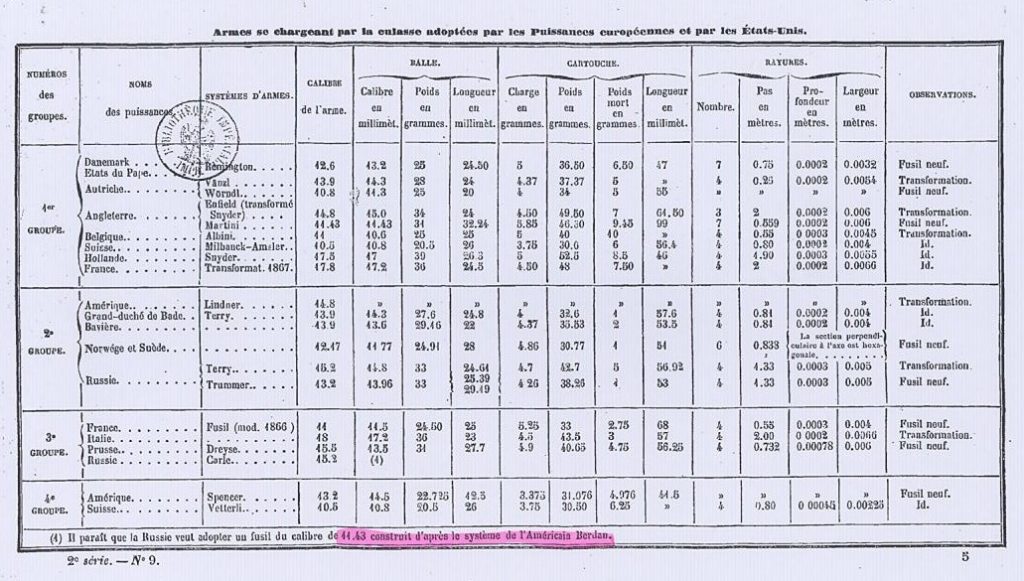
While it is necessary to keep in mind the industrial context of the era, as well as the speed with which the weapon was manufactured and distributed, it still seems that several criticisms can be leveled against the Chassepot rifle’s design, contrary to the previous article.

Table of breech-loading firearms adopted by European countries and the United States.

The Chassepot Rifle Cartridge

As previously stated, three principles competed during this period of small arms history: muzzle-loading, paper (combustible) cartridge, and metallic cartridge. Although proposed by the Versailles commission, muzzle-loading was deemed obsolete, swept away by the consequences of the Battle of Sadowa.

The combustible cartridge thus found itself in competition with the metallic cartridge. Although certain observers of the era preferred the latter, which were said to be of better quality even when sourced from abroad, its drawbacks received a larger platform. The flaws of the metallic cartridge at the time were :

  • The extra weight of the case. The weight of the casing added to that of the bullet reduces the number of cartridges a soldier can carry ;
  • The chemical reaction between the case and the powder, which can lead to the early decomposition of the gunpowder ;
  • Difficult extraction ;
  • Cases that are prone to splitting ;
  • The requirement of an extractor. A delicate and therefore fragile part, not easily replaced by the soldier on the battlefield ;
  • The cartridge cannot be reloaded or manufactured by the soldier ;
  • The tooling required for mass production is deemed too expensive ;
  • Dimensional variations in the cases due to different manufacturers ;
  • The ammunition’s lack of power ;
  • Chambering difficulties if the case is dented or damaged ;
  • The manufacturing cost of the case.

In 1866, no metallic cartridge weapon was in competition with the Chassepot.

n 1873, the choice between modernity (metallic cartridge) and semi-modernity (combustible cartridge) had not yet been made. Public finances and past military principles led some to argue that the paper cartridge remained the future. The choice would finally be settled in 1874. This was probably the time needed to perfect the metallic case and to overcome a certain resistance to change.

The standard-issue Chassepot cartridge

The specifications of the standard-issue cartridge are :

  • Powder charge: 5.25 grams ;
  • Bullet weight: 24.5 grams ;
  • A bullet lenght of 25 mm (should be closer to 33 mm for greater accuracy, 3 times the diameter) ;
  • Bullet diameter : 11 mm.

According to the 1873 manual on cartridges for military weapons, and notably for the Chassepot rifle, the 5 qualities of a military firearm cartridge should be :

  • 1 Cartridge preservation / shelf life ;
  • 2 Consistency, speed, safety, and shooting accuracy ;
  • 3 The structural strength of the cartridge ;
  • 4 Ease of manufacturing ;
  • 5 Cost-effectiveness / low production cost.

1. Cartridge Preservation / Shelf Life

It is somewhat difficult to imagine good, long-term preservation for paper cartridges loaded with black powder. Furthermore, what kind of preservation are we talking about? The storage of components before assembly, the preservation of the manufactured ammunition, preservation during shipping, storage in ammunition bunkers, preservation during operational transport, or storage in the soldiers’ cartridge pouches… Any of these handling steps, if poorly executed, can cause damage. Combustible cartridge ammunition is fragile; it must be protected from harsh weather conditions—which is no easy task in times of war. The Chassepot cartridge is not ideal in this regard.

2. Consistency

This quality stems from the homogeneity of a batch of cartridges. It therefore depends on numerous criteria such as preservation, the consistency of components, and manufacturing quality… which means the parameters to control are significant, especially if part of the production is outsourced to civilian workshops. To this must be added the irregular deposits left by shooting residue and the paper casing in the chamber, which compromise consistency.

3. Promptness

The rate of fire of the Chassepot rifle is a real advantage compared to a muzzle-loading weapon, even more so because it allows reloading while crouching or lying down. This speed is only possible if the firearm’s chamber is not overly fouled, or if the bullet has not separated from the case inside the soldier’s cartridge pouch… among other issues

3a. Safety

It stands to reason that the Chassepot cartridge does not offer full safety guarantees. The reason has already been mentioned above: there can be no safety when firing caseless ammunition if the breech-loading mechanism is not gas-tight.

3b. Shooting Accuracy

Some of the criteria for shooting accuracy include the centering of the bullet on the barrel’s axis, the consistency of the bullet’s velocity, barrel wear and cleanliness, as well as the uniformity of the bullet’s weight and diameter.

Aligning the axis of the bullet with the axis of the barrel when the chamber is subject to fouling can seem complicated. Likewise, even in a chamber free of residue, there is always some play between the forcing cone (throat) and the bullet, causing a misalignment. This play can be reduced (but not eliminated) by using multiple layers of paper around the bullet, which will always result in compression and therefore irregularity.

Depending on the condition of the bolt’s rubber washer, gas leaks can occur, altering internal pressure and consequently the bullet’s velocity. This impacts the projectile’s trajectory flatness and, as a result, shooting accuracy. Firing residue inside the barrel’s rifling will have the same impact.

4. The Structural Strength of the Cartridge

The structural strength of the Chassepot cartridge was highly inadequate for a military round. It is estimated that 20 percent of the ammunition was damaged during the 1870–1871 conflict, sometimes destroyed directly inside the soldiers’ cartridge pouches during troop movements. Historical accounts describe soldiers fleeing the enemy due to a lack of cartridges, caused by supply failures that failed to arrive… even with the use of the railway.

5. Ease of Manufacturing

By adopting the paper-cased cartridge, decision-makers wanted to allow soldiers the possibility of assembling their own ammunition. In the event of capturing an enemy convoy or camp, fighters could then make use of the powder and primer stocks left behind by the adversary.

However, as ammunition became more complex, it was no longer as easy for soldiers to manufacture it themselves in a war that was becoming increasingly mobile. Instead, reliance shifted toward railways to transport supplies. This marked the beginning of “industrial operational support.” On the other hand, it was easy to set up manufacturing workshops with trained workers and simple tooling. It appears that poor-quality ammunition was delivered by civilian workshops during the 1870–1871 conflict. One worker could manufacture 85 cartridges per ten-hour shift.

Following changes in military practices and the increased range of weapons, ammunition consumption skyrocketed. This was likely one of the primary reasons for the supply shortages.

6. Cost-Effectiveness

In 1873, a military law programs 1,200,000 men under the flag. At a rate of 100 cartridges per staff per year, an annual requirement of 120,000,000 cartridges are required under penalty of insufficient instruction. It is easy to imagine that each component needs to be optimized in order to reduce the cost as much as possible and thus reduce the bill. In view of the annual need for cartridges, the smallest savings passed on each munition represents very quickly large sums. The paper case cartridge remains more economical than the metal case cartridge.

Can we truly say, however, that 100 cartridges a year are enough to train a marksman and maintain a soldier’s skills? This highlights the value of encouraging private initiatives, such as establishing civilian shooting ranges, founding hunting societies, teaching children marksmanship in schools, and offering civilians firearms that closely resembled standard-issue weapons so they could practice year-round without impacting state resources. Traces of these initiatives can readily be found in old manufacturer catalogs.

Many of the criteria listed above were not met; yet, the paper cartridge was accepted.

The Callebaut cartridge

“The Chassepot rifle is recognized as excellent, except for its cartridge, which every European country is seeking to improve.” (Speech by the President of the Republic, June 8, 1872)

Driven by a desire to equip the Chassepot rifle with a more suitable ammunition, the Callebaut firm (Paris) proposed a wooden-bodied cartridge. This new round, devoid of a metallic case, was known as a “chased cartridge” (étui chassé). 

This combustible-cased variant enabled faster shooting, delivering 150 rounds compared to only 101 rounds fired with the standard-issue ammunition. It recorded a single misfire out of 1,089 rounds fired. Furthermore, 207 rounds were fired without any incidents related to the rubber sealing system, compared to 85 in the standard-issue rifle. This improvement was due to the use of a rubber membrane sealing the cartridge tube, which expanded in diameter under gas pressure, thereby reducing stress on the bolt’s rubber obturator.

Upon firing, the 13.5 mm diameter wooden tube was forced into the forcing cone (throat), breaking it apart. The pieces of wood exiting the barrel effectively cleaned it. No wood particles remained in the chamber.

The cartridge’s wooden body was more durable than that of the standard-issue round. According to the manufacturer, even if it were half-crushed, the ammunition would still function. If it still functions… it must have been difficult to chamber.

200 cartridges could be manufactured in ten hours, which is 2.35 times more than standard-issue ammunition. Time was not the only thing saved; wasted or defective ammunition was reduced as well.

This cartridge does not appear to have been adopted by the military. The following year, the Gras rifle would put an end to the paper-cased cartridge; the era of the metallic case had arrived.

I have not found any illustration or depiction of this ammunition.

Conclusion

Through these two articles, one can ultimately see the gap between textbook transcriptions and the reality of war—between theory and practice.

Pressed by Prussian victories, notably the one on July 3, 1866, at Sadowa, France hastily decided to equip its army. It chose a weapon that was modern for its time: the Chassepot Mle 1866 rifle. It used this opportunity to establish new state manufactures. The choice made by France was bold. Modern engineers have not clearly resolved, and thus seldom commercialized, this type of firearm. Indeed, the use of combustible casings is bound to encounter issues that remain difficult to solve even today—most notably, chamber fouling and gas sealing. It was ambitious in 1865–1866 to attempt to replace a standard-issue percussion rifle with a weapon combining several technical advancements, hoping to solve major hurdles all at once (the use of a gas-tight breech-loading mechanism, caliber reduction, fouling caused by black powder, fouling from burnt paper residues, changes in infantry rifle doctrine, the adoption and mass production of a new ammunition, and the use of an uncommon material in gunsmithing at the time: rubber, etc.), all while being manufactured by a newly created factory

The St. Étienne arms manufacture would deliver the ordered weapons shortly before the outbreak of the war. However, what about the training of soldiers, officers, medical services, and various supply lines ?

Germany had taken the lead by equipping its army with breech-loading rifles well before other nations (1841, 25 years before France). This early adoption surely had its setbacks, but by outfitting themselves decades before the others, they had the time to overcome various technical hurdles and train their soldiers, armorers, and officers to make them fully proficient in servicing the weapon.

Germany took the lead in endowing its army with breech-loading rifles well before other nations (1841, 25 years before France). This advance certainly had setbacks but by equipping decades before the others, they had time to stop at various technical events and train their soldiers, gunsmiths, officers to make them more fit to fight.

Following the Ems Dispatch, and despite warnings from Adolphe Thiers, France declared war on Germany. The war lasted from July 19, 1870, to January 29, 1871—just over six months. The result of this lack of preparation was the loss of Alsace-Lorraine, a territory that would remain German until the end of World War I, 47 years later

Fundamental issues directly affecting Mr. Chassepot’s patents should have been experimented with earlier. This would have allowed various civil and military maintenance and supply echelons to rectify certain flaws before the conflict. Alternatively, France should not have declared war on Germany until these anomalies were resolved. Starting in 1874, Chassepot rifles would be converted to fire metallic cartridges. It would then bear the name 1866/74 Gras.

By 1873, America, Great Britain, and Belgium had adopted metallic cartridge firearms. France resisted; the reason may stem from the absence or limitation of private industries, which usually bring forth greater innovation and competition in the hope of securing major government contracts. France preferred the opposite: a monopoly of national manufactures. History demonstrated their potential insufficiency during the war of 1870–1871 and for many years thereafter. To read :

The importance of regimental armorers and private enterprises in advancing the small arms world and rapidly modifying standard-issue weapons is well-established. A nation must nurture knowledge and talent. Today, the state of the arms industry in France is such that private industry is dying out, the St. Étienne arms manufacture is closed, and the French army’s next assault rifle will be German…

Useful Sources for this Article :

Posted in All articles, Ammunitions, Military french guns, Rifles | Leave a comment